
Farrier Takeaways
- Bold section shoes have become popular again for the wide-webbed effect and use in corrective farriery.
- Consider the foot type, surfaces and horse’s job before selecting — don’t use this section on weak footed, thin walled horses due to the weight of the shoe.
- The nature of the bold section allows for ease of applying variations dependant on the requirements of the horse being shod.
- The section also can be turned the opposite way if the farrier wishes to coarse nail a thick-walled horse or create a lightweight bevel shoe.
Various horseshoe designs have been found to have had an effect on hoof loading on synthetic surfaces.1 The most common sections used here in the United Kingdom are concave and flat. Bold section was then developed in the United Kingdom in 1984 by Arthur Cottam Horseshoes Co. The primary reason behind its development was the opinion of many that there were no suitable shoes for horses that show jumped and occasionally went hunting.
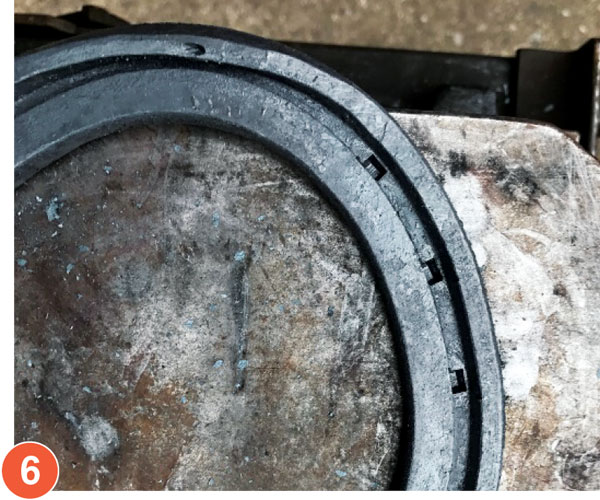
Bold section is creased like concave, but has an upright inner edge as opposed to a beveled edge found in traditional concave sections (Figure 1). When formed, it has the appearance similar to a fully fullered shoe. The purpose was to provide extra cover on the ground surface of the shoe similar to a wide-webbed shoe, while at the same time providing traction. Initially the shoe was used on heavier cob type horses but soon was applied to sport horses with British show jumping legend Michael Whitaker publicly endorsing the use of the bold section.
Over time, other manufacturers began to develop their own versions of the section, with Baker Horseshoe Co. applying a shallow fullering to the inner edge to increase traction and width, this section went by the name of the “Endurance Shoe.” By 1987, Arthur Cottam was producing a variety of bar stock widths and two thicknesses at 5/16-inch and 3/8-inch.
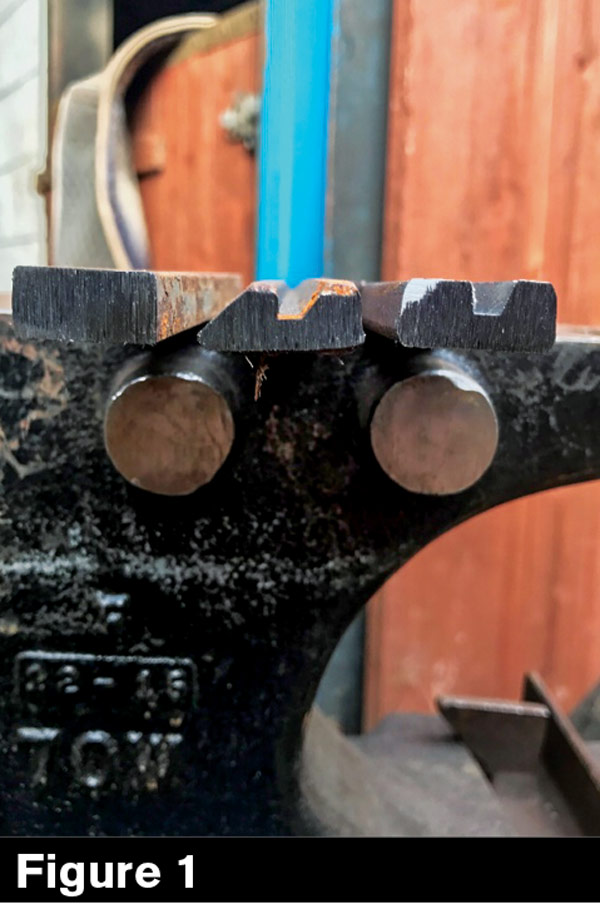
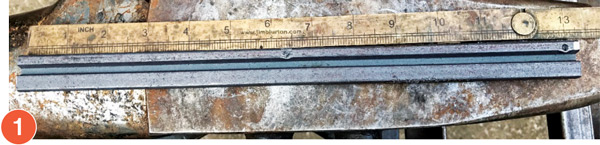
Comparison of flat, concave and bold sections.
During the turn of the century, bold shoes started to dwindle out of favor due to a change in farriers spending habits, instead opting for lesser cost shoes. The use of lighter shoes and an increased range of ¾-fullered shoes also affected the use of bold section. By the mid-2000s, very few bold shoes were used. Recently, a number of manufacturers such as The Concave Horseshoe Co. have started to manufacture the bold section again due to increasing demand by farriers in the UK.
A reason that this could be due to the increase of the number of horses working on artificial surfaces that require flotation on the top of the surfaces. The ease of making shoes with this wide-webbed section and the simplicity of applying variants to the shoes for corrective farriery purposes have made this section popular again. Modern shoeing trends seem to focus more on keg shoe modifications and weld inserts2 rather than making shoes from scratch, yet the design of the section lends itself to these.
Versatility Of The Section
The section can act as a halfway compromise between the traction of concave and the wide-webbed capabilities of a ¾-fullered shoe. In my own practice, I use the shoes on strong, thick-walled hooves and horses doing plenty of road work due to how well the section stands up to wear. I would advise not using the section on weak footed, thin-walled horses due to the weight of the shoe, and would opt for a lighter ¾-fullered shoe instead in those instances.
The nature of the bold section allows for ease of applying variations dependant on the requirements of the horse being shod. The increased traction compared with flat shoes can be beneficial to those that do a large amount of roadwork, but also allow for flotation in an arena surface should the horse also compete. More specifically, this section would be best suited to horses that are used for more than one purpose.
Increased width can be achieved at the toe using a fuller to help horses that require extra protection in this area from injuries such as sole bruises. Heel extensions can be achieved by either bumping up the section in the straight or fullering the inner web3, which will help horses with poor conformation behind or spavin issues, as these shoes will spread the load during weight bearing and impose symmetry on an asymmetric hoof.
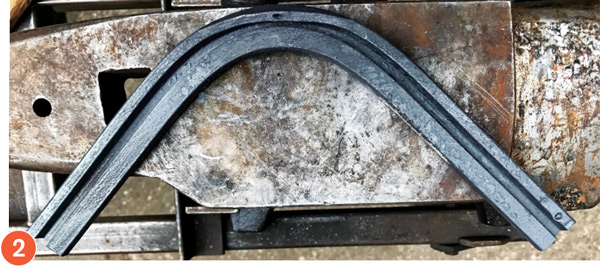
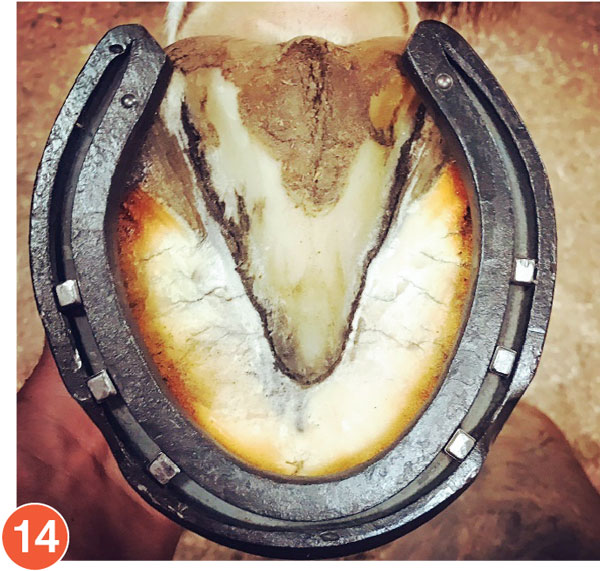
The bold section with a wide, double fullered toe and additional tungsten pins on the left and a lateral support hind on the right. Note the jumped up outside heel and coarse plain punched nailhole.
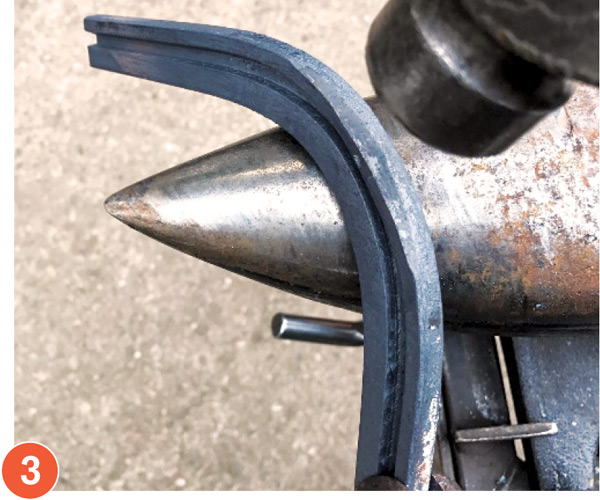
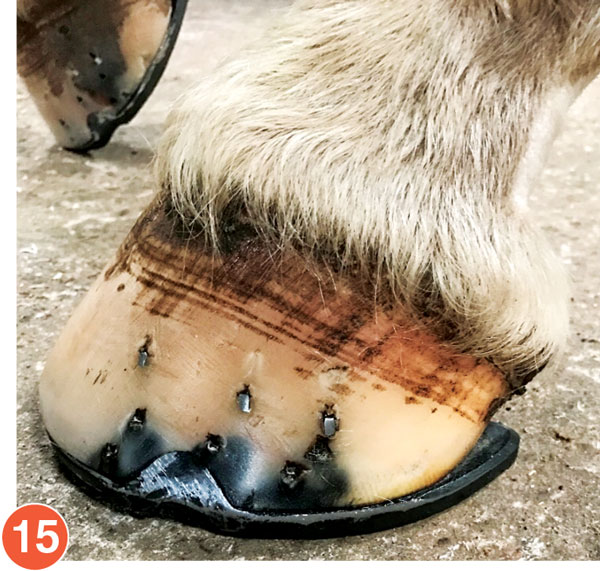
Wide heel bold shoe using a combination of jumping up the heel and spreading using a fuller.
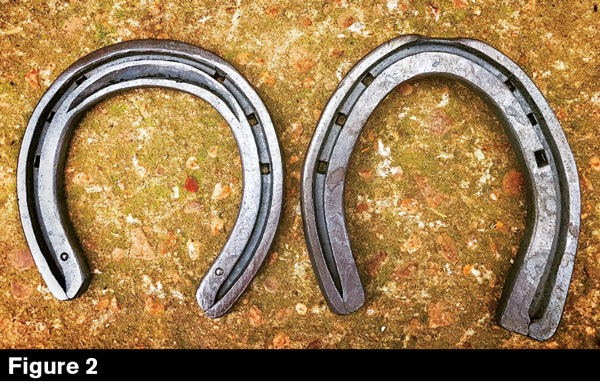
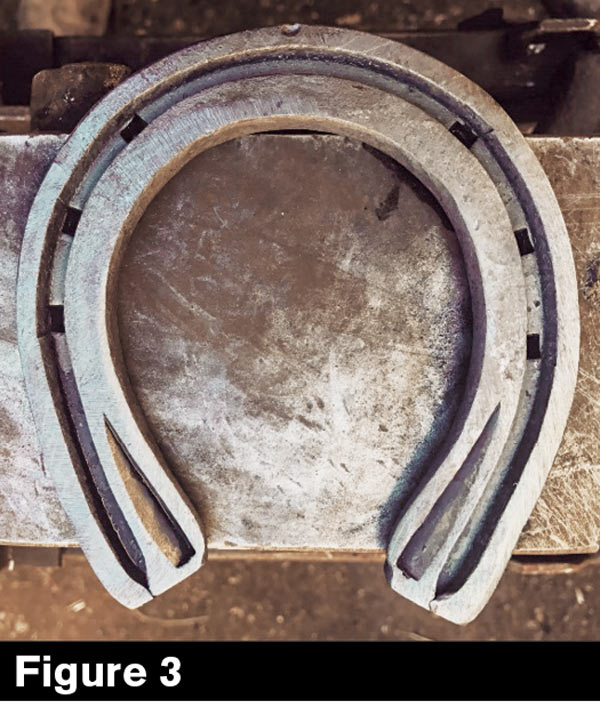
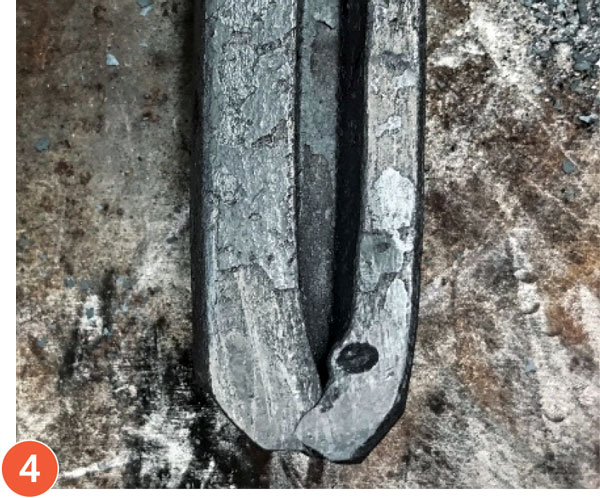
There is plenty of space on the inner web to apply plain stamped nail holes or tungsten pins for increased traction if the horse is doing a large amount of roadwork and increased traction is required (Figures 2 and 3). The section also can be turned the opposite way if the farrier wishes to coarse nail a thick-walled horse or create a lightweight bevel shoe (Figure 4).
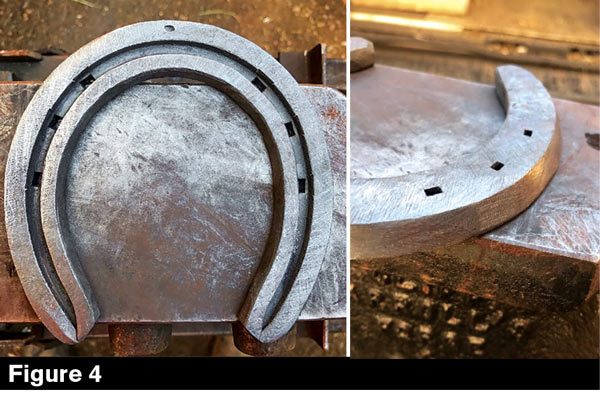
Turning the bold section the opposite way can provide a lightweight bevel shoe. The bevel can either be forged or fabricated using a grinder to make the angle of the hoof wall.
If It Fits A Need, Give It A Try
The bold section is a handy shoe to have given the right set of circumstances and would be considered another option for the farrier to choose from. The versatility should appeal to those who enjoy keg shoe modifications or create something a little different when making a handmade.
Step-By-Step
Here is an example of making and fitting a hind bold shoe. The horse used in this demonstration is a hunter, shod every 6 weeks.4 This horse in my example has been shod in this style for around a year and is used for hunting once a week, gets lots of road riding and occasionally competes in dressage.
This type of section along with tungsten pins allows for the horse to do plenty of roadwork with suitable traction along with keeping the horse working on top of a deformable surface. Most of the procedure of this shoe making is similar to working concave shoes.
Mark the center of the steel 1/8-inch toward the medial aspect of the hoof that you intend to fit. This will allow for the slightly longer lateral branch.
Turn the toe with the rounded side of the turning hammer over the bick in the same way you would do with a concave shoe. Make sure the shape of your toe corresponds with the shape of the toe of the hoof you are about to fit. Work both the ground and foot surface to ensure the shoe is both level and flat.
Turn the ground surface slightly away from itself and using overlapping hammer blows on the bick, safe the toe off, which will help prevent interference injuries. Make sure you maintain a symmetrical arc in the toe.
Form the heel by folding in the edges of the end of stock on the face of the anvil. The inside heel check should match the angle of the frog. The outer edge should be rounded for a safe fit.

Turn the lateral branch as you would any other handmade shoe, ensure the arc going into the widest part of the shoe matches that of the arc coming away from the widest part going to the heel.
Stamp the toe nail at a horizontal line to the inner web of the center of stock. This will help keep your toe nails balanced. Then stamp a nail hole at the widest part of the shoe and finally another nail hole halfway between the two nail holes. Level the shoe on the foot surface and pritchel through at a dull heat over the pritchel hole.
Form the medial heel in the same way as Step 4, but also provide about 1½-inch of safeing by placing the stock at 90 degrees to the foot surface on the anvil face and using overlapping hammer blows getting heavier toward the heel.
How the finished hammer safeing should look.
Repeat the process of Steps 5 and 6 for the medial branch to have a complete balanced shoe.
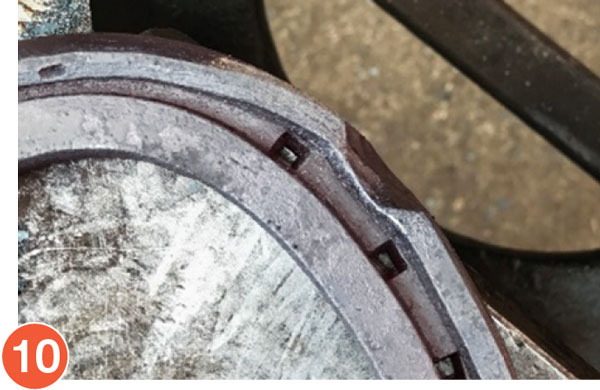
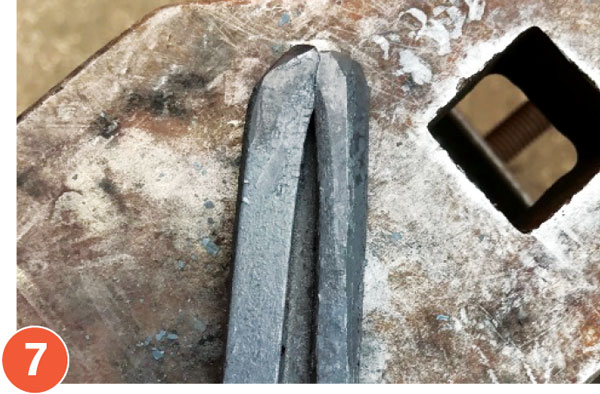
Using the round side of a ball pein hammer, tilt the shoe over the edge of the anvil and begin to push away a clip source using overlapping blows.
The drawn-out area is now ready to pull the clip using the flat side of the hammer on a sharp edge of the anvil.
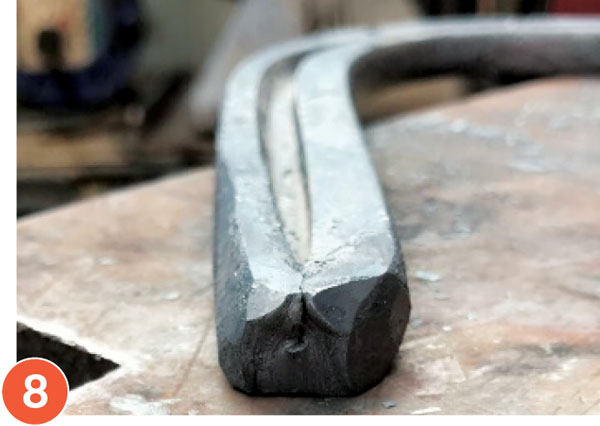
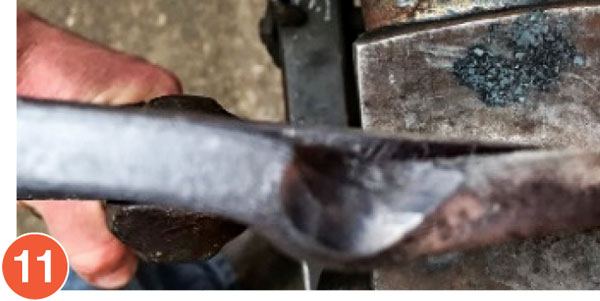
The finished hammer drawn clip. The angle the clip is set against the shoe should correspond with the angle of hoof wall.
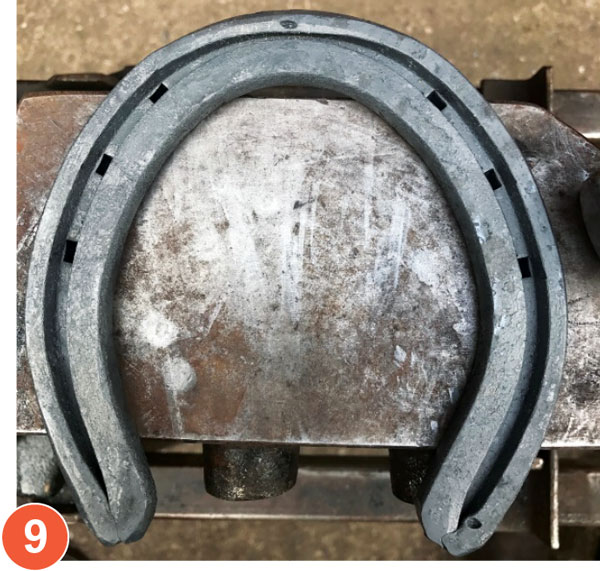
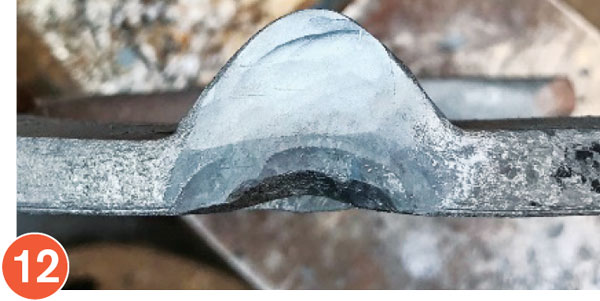
The finished shoe ready to fit to the horse being shod.
Bold shoe on the foot — symmetry, balance and function imposed.
Lateral view of the finished job.
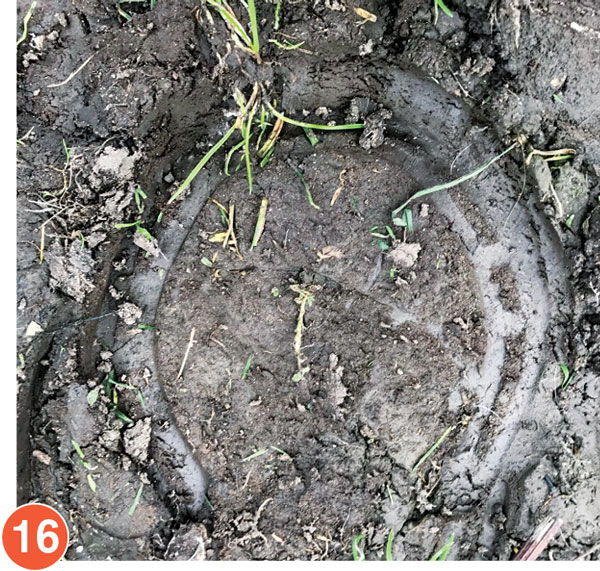
Wide webbed foot imprint in dirt showing how the bold section can help spread load during weight bearing.
References
- Mahaffey C.A., Peterson M.L., Thomason J.J., and McIIwraith (2015) “Dynamic testing of horseshoe designs at impact on synthetic and dirt thoroughbred racetrack materials,” Equine Veterinary Journal, Vol. 48, pp 97-102.
- Jerram, M.A (2016) “Using weld inserts for corrective farriery purposes,” American Farriers Journal, July 2016.
- Wilson A.M, McGuign P, and Pardoe C. (2001) “The biomechanical effect of wedged, egg bar and extension shoes in sound and lame horses.” AAEP Proceedings, Vol. 47, pp 339-343.
- Balch O.K., Butler D., and Collier M.A. (1997) “Balancing the normal foot: hoof preparation, shoe fit and shoe modification in the performance horse,” Equine Veterinary Education, Vol. 9, pp 143-154.


Post a comment
Report Abusive Comment