Last year, Victory sponsored the first annual Summit Mail-In Forging Competition in which the shoe was a hammer-finished, jump-welded heart bar.
Victory is sponsoring another free mail-in competition in which everyone receives a free T-shirt and the top finisher will walk away with a buckle and free registration to the 2017 International Hoof-Care Summit.
We’re upping the game this year with some creativity and have a shoe that I have never seen or heard of. As farriers, we have to be great at all sorts of creative and artistic tasks, and making something that can do the job while we are on site is just part of the trade. As such, I wondered what an aluminum shoe with a steel bar made out of a rasp would be like.
I decided to make the shoe out of 1/2-inch by 1-inch aluminum so that I could have ample thickness to rivet the bar in place. In the end, I made four shoes to get to my desired finished shoe for this contest, and I still want to make others to improve it. However, a deadline is a deadline, and we need to present this shoe so you’ll have time to make one before the February International Hoof-Care Summit.
I think you’ll find yourself in the same position in the months leading up to the Summit. The shoe itself is quite simple, but making the bar out of the rasp and getting it in place challenged me and required research and development.

Sponsored by Victory, this forging exercise requires making an aluminum shoe and a bar made from an old rasp. You have until Jan. 27, 2016, to get your entry into the AFJ office. Read instructions on how to enter on Page 34. All photos by Kaylee Bennett.
For this shoe, you will need an 11-inch piece of 1/2-inch by 1-inch aluminum bar stock and an old rasp (Figure 1).
Making The Bar
The first step to make this finished shoe is to start by making the bar. I cut off the end of the rasp so that I had full teeth in the bar for the look of the finished shoe (Figures 2 and 3).With the round side of my rounding hammer, I begin to forge the shape into the bar, leaving a spot in the middle of the bar for the sex appeal (Figure 4). You can do some of this on the horn (Figures 5 and 6), and if you have access to a good striker, don’t hesitate to employ that help.
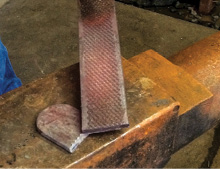
Figure 3
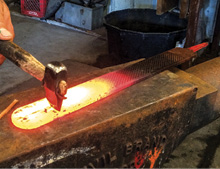
Figure 2
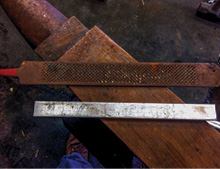
Figure 1
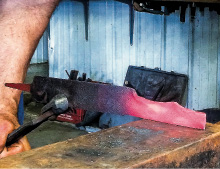
Figure 6
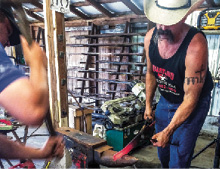
Figure 5
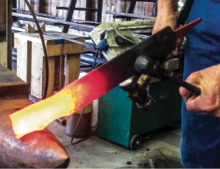
Figure 4
Once your desired shape is achieved, you can cut the bar off of the rest of the rasp. This is done at an angle so that there is less to rasp off once the bar is attached to the shoe (Figures 7 and 8). Punch two holes in each side of the bar for the nail rivets (Figures 9 and 10) and clean up the bar in the vise with a file (Figure 11).
Finish with a bar that looks like the one shown in Figure 12. Don’t quench the bar during this process so that it does not become hardened or brittle. At the final stage of building the shoe, you will want the bar to be annealed so that any last filing can be done.

Figure 9

Figure 8
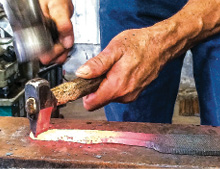
Figure 7

Figure 12

Figure 11
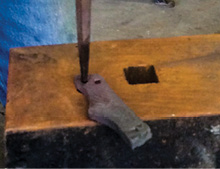
Figure 10
Making The Shoe
Next is basic aluminum shoe building. Heat the stock until you can run a piece of wood over it and a black scorch mark remains (Figure 13). If you make a mark that burns away, the stock is too hot. If no mark can be made, the stock is too cold. Make a toe bend (Figure 14), mark the start of your fullering (Figure 15), and build the shoe (Figures 16-18). You don’t have to make perfect heels at this point since most of the heel-work is going to be done with a rasp once the bar is fit.
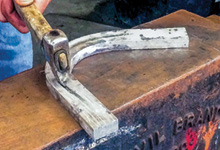
Figure 15
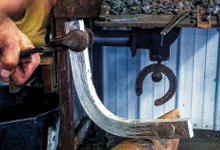
Figure 14
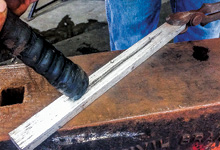
Figure 13
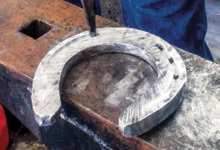
Figure 18
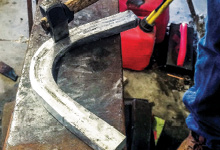
Figure 17
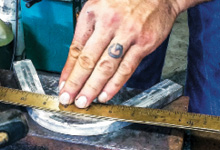
Figure 16
Place the bar over the heels of the shoe (Figures 19 and 20) and scribe a line to cut with the fuller. Now begin the shoulder set down for the bar to be attached to. Cut with your fuller making sure that the straight part of the fuller is towards the toe of the shoe (Figure 21).

Figure 21

Figure 20

Figure 19
Don’t cut too deep at this point. For the shoulder, you can use a set hammer (Figures 22 and 23) or use a sharp corner on the anvil and hammer on the hoof surface of the shoe with half-faced blows.
Spend some time in the vise with a rasp trying to get everything lined up straight so the bar fits tight and has an evenly spaced seam between the rasp and the shoe when you are done (Figure 24).
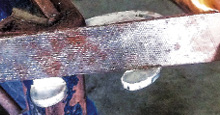
Figure 24
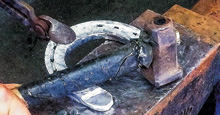
Figure 23
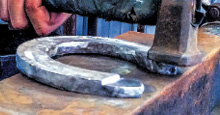
Figure 22
Your shoe should look like Figure 25 at this point. Mark the holes in the shoe through the holes that you punched in the bar (Figure 26) and pritchel those holes out of the heel of your shoe. (Figures 27 and 28). Go back to the vise and shape your heels with a rasp (Figures 29-31).

Figure 27
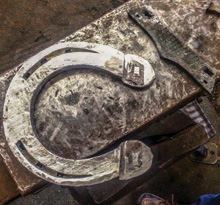
Figure 26
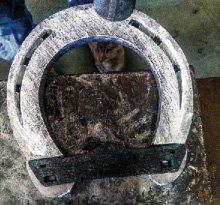
Figure 25
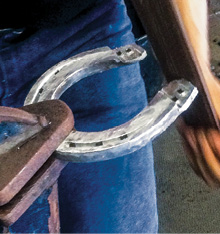
Figure 30

Figure 29
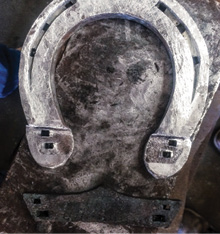
Figure 28
Take some Victory city head 6 nails and smash the heads so that they are a little smaller (Figure 32). Drive a couple of them through from the bar side (Figure 33), cut them off and brad them up on the hoof surface of the shoe. Drive a couple of nails through from the shoe side (Figure 34) and brad them up on the ground surface of the bar (Figure 35). Your shoe should look like Figure 36 at this point.

Figure 33
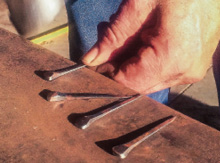
Figure 32

Figure 31
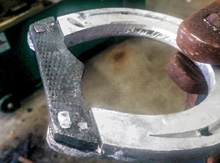
Figure 36
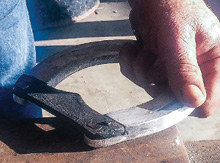
Figure 35
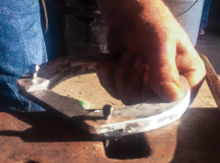
Figure 34
The rest is finishing. Put the shoe in the vise to file the junction of the bar and shoe (Figure 37). This is the main part of the shoe that makes it different than any other shoe I have seen before. Heat the shoe slightly and brush it vigorously with a fine wire brush to make the aluminum look clean and smooth (Figure 38).
When you are finished you will have a shoe that looks like Figures 39-41. It comes in right at 5 3/4-inch by 5 3/4-inch. This is a very fun shoe to make, and who knows, you may end up having to use some of these techniques at the horse someday. If you do, please take pictures, send them to American Farriers Journal and tell us how you used it.

Figure 39

Figure 38
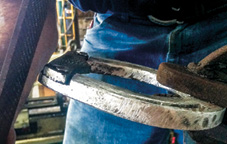
Figure 37
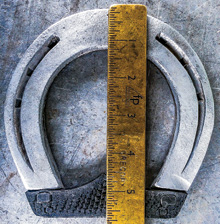
Figure 41

Figure 40
How to Enter
Step 1: Make the shoe as described by Chris Gregory.
Step 2: Obtain and complete the entry form at americanfarriers.com/summitshoe. If you are unable to download the form, contact American Farriers Journal at 262-782-4480 to request a form to be sent in the mail.
Step 3: Send in the completed form and your shoe. If you won’t attend the IHCS: Mail this entry form and your heart bar shoe to American Farriers Journal, Summit Mail-In Forging Exercise, 16655 W. Wisconsin Ave., Brookfield, WI 53045. Your entry must be received by Jan. 27, 2016.
If you are entering from outside the U.S., DO NOT assign a value to your shoe on the customs declaration form.
If you are attending the IHCS: Drop off your entry form and heart bar shoe in the Duke Energy Center near the IHCS registration by 5 p.m., Tuesday, Feb. 2, 2016.
Step 4: Each contestant will receive a free commemorative T-shirt and brief critique from the judges. The top finisher will earn a belt buckle and 2017 IHCS registration.
T-shirts and critiques will be mailed by March 1, 2016. All shoes not picked up at the IHCS will not be returned.





Post a comment
Report Abusive Comment