Ninth in a Series

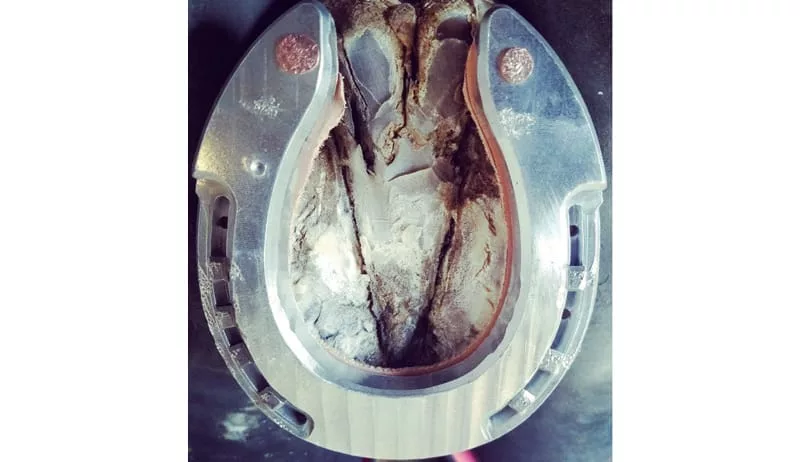
In this series, we have examined different shoeing applications and various alternatives for achieving the same desired outcome. In this final installment, we explore the light rail or omni-directional shoe.

Achieving the benefits of the therapeutic applications that have been covered over the past eight installments generally can be replicated by most any skill level and budget. The same is not true for the ninth and final subject — the light rail or omni-directional shoe.

Each option detailed in this article is arguably the most difficult shoe to recreate and apply that have been featured in this series. Unlike most of the previous installments, incorrect application of a light rail/omni-
directional shoe will have devastating outcomes for the horse.

It requires significant education and skill levels from both the farrier and the equine veterinarian. We recommend attending Dr. Ric Redden’s 5-day Equine Podiatry Course for a greater understanding of the concepts and application of this shoe. In addition, the horse owner should expect a larger than normal financial commitment regardless of whether manufactured shoes or modified shoes are applied.

For optimum results, the strategy for the mechanical plan is developed from pre-trim/shoeing radiographs. The lateral and dorso-palmar (DP) views require a low-beam perspective (½ to ¾ inch above the positioning block). This produces an image that reveals one branch of the shoe and the wings of P3 superimposed when medial lateral rim balance is present. Often radiographs are required to fine-tune the palmar angle (PA), medial lateral rim and joint balance, digital breakover and the degree of mechanical deep digital flexor tendon (DDFT) tension let off before final decisions are made. It is beneficial to have post shoeing radiographs as they can confirm whether the mechanical plan was met. The post shoeing images become a valuable reference point for comparative images and a means of monitoring the efficacy of the chosen plan.  Shoeing with X-ray guidance is focused on enhancing the healing environment by mechanically shifting load from vascular deprived components to more healthy parts of the foot.

Farrier Takeaways

  • The light rail/omni-directional shoe can provide a multitude of therapeutic benefits for horses with laminitis, founder, arthritis and others.
  • It’s critical that both the farrier and veterinarian understand the purpose of the shoe, anatomy of the limb, how the shoe affects the limb and how to apply the shoe. Improper application will prove detrimental to the horse.
  • Communication with the client is critical to ensure that the shoeing cycle, rehabilitation program and expected costs are all understood and followed.

When applied correctly, the light rail/omni-directional shoe can help achieve a multitude of therapeutic benefits under the care of a qualified farrier and knowledgeable veterinarian. It’s been used to treat acute and chronic laminitis and prevent compensatory founder due to overloading. It also is used in equine rehabilitation after rest or during confinement, subject to a widened diagnostic approach that considers the underlying issues. Other uses or benefits are as follows.

  • It can change the palmar angle according to its position under the center of articulation (COA).
  • It reduces anterior and posterior lever arms when a belly is placed properly in the shoe, which is one of the most important features. A thorough understanding of lever arms and mechanical function of the suspension (DDFT, coffin bone and laminae, wall) and support components (frog, digital cushion, bars, sole and wall ground surface) is paramount for optimum results.
  • It allows dynamic modulation of the pastern angle in motionless or quasi motionless situations. When the horse loads its foot on a flat surface, blood flow in the foot remarkably diminishes where tension and compressive forces are focused. When the shoe has a belly or pivot point around the center of articulation, the solar capillaries and distal laminae flow are enhanced. The shoe placed properly has self-adjusting properties allowing the horse to adjust the PA and forces on internal components. The rocker shoe should always provide an increased PA never rocking back. It’s critical to point out that the level of mechanics in the shoe should relate directly to the degree of damage in the foot and the level of exercise. However, mechanical rockers of various degrees can be beneficial for high-level horses when the vet/farrier team has good working knowledge and experience with mechanical shoeing.
  • It can provide a self-massaging effect, improving blood flow to horn growth centers and ultimately improved sole and horn growth.
  • The rocker/omni-type shoe allows you to adjust or correct the P2 and P3 palmar angle according to the shoe position under the COA. The best way to be precise is with the use of radiographs.
  • It improves blood circulation and reduces stress on tendons and ligaments during interphalangeal extension when the shoe is applied correctly.
  • It minimizes lamellar and solar stress due to leverage.

There are also downsides of the shoe.

  • It is essential the mechanical plan is established via radiographic information.
  • Farriers need to develop radiographic interpretation skills relative to the mechanical trim, shoe design and placement.

  • Veterinarians need to become familiar with podiatry-focused views, provide them in a timely fashion for the farrier along with the diagnosis and proposed mechanical solution. The end product ultimately lies in the hands of the farrier, thus the great need for a good look at the internal arrangements of vital components and a sound mechanical plan.

  • Heel crush can become problematic, especially in the low foot of the mismatched pair; however, timely, positive frog support can be beneficial management aids.

  • Forging the belly in a flat shoe, rail, full rocker or fabricated shoe requires good working experience with mechanical shoes and no one is immune to the perils of the learning curve.

Key Factors

In this series, we are detailing different shoeing applications and various options for how to achieve the same desired outcome. Each application presents a different journey that is influenced by a set of variables — skill set or education, price, availability and environment.

Skill set or education. Each farrier has a particular set of skills. One who has been providing hoof care for 40 years will have significantly more experience and knowledge than a colleague who is fresh out of farrier school. We have created a rating system, if you will, that categorizes the skill set or education level that is required to properly create and apply a specific technique. It is as follows:

Skills.jpg

Price. While skill set and education vary from farrier to farrier, horse owners also are different. Each has a specific tolerance for how much they are willing to spend on a given hoof-care modality. As such, we have created another rating system that distinguishes its affordability across the modalities. It is as follows:

Costs.jpg

Availability. Regardless of your skill set, you might find that some materials aren’t immediately available for you to properly build the application, whether it’s because you don’t typically carry the inventory on your farrier rig or trailer, your supplies are depleted, or your local supply shop is out of stock. These situations call for us to rely on our creativity with what we have on hand. 

Environment. . In all shoeing applications, we must consider whether it’s appropriate for the horse, what it does for a living, where it performs its job, where it lives and its environmental climate.

file name

Radiographs will help to ensure that the omni-directional shoe is placed under the center of articulation.

file name

A horse with a prolapsed frog and flat sole benefitted from the slight heel lift that the omni-directional shoe provided.

Manufactured Shoes

Manufactured Shoes.jpg

The Grand Circuit Open Extra Therapy (OXT) shoe features an enhanced roll that starts just behind the center of the shoe and a slight break in the heels to ease landing. It has a full heel section that’s similar to a navicular shoe, allowing a farrier to modify it to create an air wedge, which is achieved by rolling the aluminum material under the COA.

The advantages of the shoe also create disadvantages. Since the shoes are thick aluminum, they are not easy to shape or balance. Your hammer blows must be precise. Mike prefers to strike the outside of the crease or the inside of the thickest part of the shoe, depending on where the shoe requires balancing. Laura balances the heels and toe, then creates a belly on the solar surface to match the horse’s COA. In addition, your nailing must be precise and clinching can be difficult. Modified clinchers can be helpful, but the easiest solution is hammer clinching with a block.

The OXT is a forgiving shoe because you can keep it flat at the solar surface, but a farrier can’t wing it while using this shoe. You need skill, knowledge and education to shape, balance and apply them. You must know what you’re doing, how to modify it and know why you’re doing it to apply it correctly. It’s imperative that you consult radiographic images, as well, until you gain proficiency in reading the foot.

Knowledge of how to capture quality radiographic images is important, as well. The image will vary depending on where the foot is placed underneath the horse. If the horse in Figure 1a is placed a little farther back, you will have a different X-ray. You need the education to understand how the horse is standing and where the foot should be on the block to capture the perfect image.

This horse has a prolapsed frog with lightly beveled heels and toe, as well as a slight heel lift (Figure 1b). It also had a flat sole, necessitating a leather rim pad to help reduce concussion.

Communication with the owner is critical. Generally, this horse should remain in a controlled area while wearing any version of these shoes. They were not developed for horses in turnout. However, it’s not uncommon for owners to feel sorry for the horse since it’s generally cooped up.

To avoid losing shoes in these cases, Laura uses size 3 ESL-Pitch nails, Concave nails, both from Mustad, or any E-head nails. Since the Grand Circuit OXT nail holes are drilled round, she finds that these three options remain tight throughout the shoeing cycle. Other options such as the size 5 City Heads or Slim Blades tend to bounce out. A lost shoe in this therapeutic situation likely results in a significant setback in the rehabilitation process.

file name

A barrel horse that was ridden by a young girl was shod in a Grand Circuit Open Extra Therapy (OXT) horseshoe after experiencing mechanical separation of the laminae, navicular and navicular bursa inflammation. The shoe features a belly under the center of articulation (COA). This allows the horse to rock forward to create an air wedge that alleviates pressure on the caudal aspect of the foot. The belly must be placed under the COA. Tacking the shoe on and having a veterinarian take radiographs to confirm the proper placement of the application is advised until you have acquired sufficient experience to read the foot accurately. The foot was run out another 2 inches. The toe was rasped back to the shoe to alleviate the mechanical laminae separation.

A barrel horse (Figures 2a-c) that was ridden by a young girl benefitted from the aforementioned air wedge modification of the OXT. The horse was experiencing some mechanical separation of the laminae, navicular and navicular bursa inflammation.

When the horse came to Laura, its foot was run out another 2 inches. She alleviated the mechanical separation by rasping the toe back to the shoe. The shoe was modified with a belly under the horse’s COA, allowing the horse to rock forward to alleviate the pressure on the caudal area of the foot. The horse responded well to the shoeing and returned to work.

file name

Two sheared pieces of steel that are ½ inch on the heel end and taper down to zero at the toe were welded to the insider perimeter of the shoe. The modification allowed the arthritic horse to breakover more easily. A pour-in pad was also incorporated to keep the heels from sinking into the ground, which aggravated the horse’s sidebone.

Welding Option

Welding Option.jpg

Wellington, Fla., farrier Dave Farley helped a horse with sidebone move easier by applying a rail shoe modification.

The International Horseshoeing Hall of Fame member modified a Kerckhaert DF by welding two pieces of sheared steel that are ½ inch on the heel end and taper down to zero at the toe (Figure 3a). They are welded on the inside perimeter of the shoe to allow the horse to breakover easier both medially and laterally. After applying the shoe, Farley used a foam board on the bottom of the foot for the Vettec pour-in pad (Figure 3b), which kept the heels from sinking into the ground as it aggravated the sidebone when the heels were low.

This complex modification will require a conversation with the client and veterinarian before application. The veterinarian must understand the dynamics of the shoe and have faith in your abilities. A plan must be in place. Like any shoe, there is always the possibility that the horse won’t like it.

The conversation with the client will not only include the necessity of the shoe, but also the shoeing schedule going forward. This application will require a 5-week cycle at most. The client must understand the cost, as well. This modification requires a welder, the knowledge and experience to weld it properly, pour-in pad materials and the knowledge and skill to apply the pad materials. The cost must include the education to apply them and the knowledge that this is in the best interest of the horse. The price will vary due to regional material cost differences.

file name

Bar or round stock, as well as old shoes from the scrap pile are beneficial to modifying keg shoes into an omni-directional shoe. A grinder was used to achieve a slight belly for a rolling motion to reduce hoof wall leverage.

Welding Inserts

Welding Inserts.jpg

A cost-effective and relatively simple welding option to assist an arthritic horse is the use of inserts (Figures 4a-c). While the Werkman Ortho-Kit is certainly a viable choice, University of California, Davis farrier Shane Westman utilized materials already in his shop.

There are several ways to achieve this welding modification by using bar or round stock, but the most cost-efficient way is to simply cut up an old shoe from your scrap pile. If you’re handy, jump welding the inserts to the inside web of the ground surface certainly will be effective. However, a simpler and possibly more reliable alternative is using a welder. After welding the inserts, Westman used a grinder to easily achieve a slight belly for a rolling motion to reduce leverage from the hoof wall. Impression material can be added if you wish to keep the sole/frog engaged with the ground or on firmer footing, which is the main concern with the added depth.

file name

When a horse requires greater roller motion, inserts can be welded in the middle of the shoe from the toe to heel. The rails can be adjusted to the desired height.

When a hoof has been overly shortened to where the sole is thin or over-bearing weight, inserts can be welded in the middle of the shoe from the toe to heel (Figures 5a-c). The middle rails can be adjusted as high or low as necessary. The omni-directional rocker, as Westman refers to it, creates depth and allows the shoe to be placed while not burdening the sole. In addition, this application can also be used in cases such as osteoarthritis (OA) when more roller help is needed, as it creates a deeper roll than a rolled toe. It is often difficult to pinpoint exactly where the bony changes are in a joint, and horses tend to want to break in the direction of the OA. Rather than dictating the direction of the roll over, like with a rocker toe, the omni-direction provides leverage reduction in multiple directions and lets the horse move most easily in the direction they prefer.

It’s important to remember that not all barns are equipped to handle the electricity necessary to operate a welder. We’ve had barns that tripped circuit breakers after running a grinder. Another barn was left with a damaged electrical outlet after welding. When Mike needs to weld a shoe at one of his larger barns, he has to take it to another barn down the street and come back to apply it because the electrical system can’t support the equipment. You’re operating a business. You must weigh whether the extra time and costs of providing this service are a good
business decision.

file name

Hammer control is a necessity when modifying a keg shoe into an omni-directional salad bowl shoe. The modification will change the pitch of the nails.

Keg Shoe Modifications

Keg Shoe Modifications.jpg

Modifying a keg shoe into an omni-directional salad bowl shoe is a relatively quick and easy method to achieve leverage relief (Figures 6a-c). The solar surface of this application is chamfered by using a half-round hammer along the inner web of the shoe. The most difficult part of this shoe is achieving balance.

Modifying an aluminum ACR shoe into a salad bowl (Figures 7a-c) is another relatively simple solution. The ground surface is much smaller, which provides the horse with the omni-directional options.

While the modifications have a lower degree of difficulty, that doesn’t mean that less skill and education are required. A farrier applying these shoes must understand the horse’s anatomy, the purpose of the shoe and why it’s the best choice for that horse in question.

These modifications also change the pitch of the nails. It’s critical to adhere to the fundamentals. One of the first things that farrier students are taught in school is you’re fine to drive nails into the white line when the foot is outside the coronary band. Driving nails that will go inside the coronary band will be detrimental to the horse.

file name

Modifying an aluminum ACR shoe into a salad bowl is a relatively simple task. However, forging in aluminum can be tricky if the farrier lacks experience.

Farriers who do not have experience forging with aluminum should practice. It’s much more difficult to determine when aluminum is ready to forge than steel shoes since they do not change color. Place them in a hot forge for 10 to 12 seconds and remove them. Drag your wooden hammer handle across the shoe. If it smokes, it’s ready to be forged. When aluminum is in the forge too long, it can burn up or melt. The aluminum ACR shoes run between $60-80 per shoe. A mishap in the forge can quickly eliminate your profit.

These applications are not the shoes to claim that you understand them when in reality you don’t have the experience. When they are not placed around the COA and the air wedge isn’t perfect, the horse will stand like it’s foundered because its suspensory ligaments are loaded and will become lacerated.

When the breakover is too far back, it will elevate the horse. The more elevation, the more the fetlock will drop. That will place more pressure on the suspensory.

Although this shoe is complicated, don’t be afraid to step out of your comfort zone. Learn from someone who has extensive experience with it. You will be rewarded with knowledge that can help the horse.