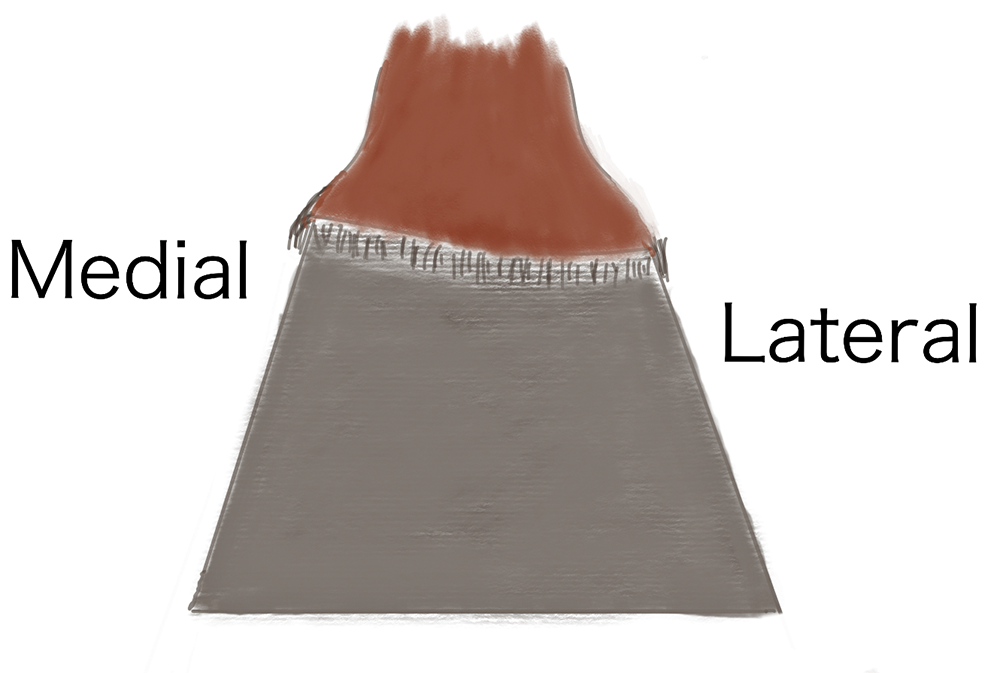
Adding to the idea that hoof shape influences gait, I want to illustrate the offending hind hoof typical to trotters that are interfering. Figure 1 is a common example of such a hoof. This will be the left hind in all drawings.
When the horse is in a square stance and on flat/level ground Figure 1 is the first thing noticeable in many interfering trotters. Published research identifies this issue going back 100 years. It is the manifestation if a hoof adapting to speed, miles and conformation.
| Figure 1 |
Notice in Figure 1 the medial wall is higher at the coronary band than the lateral wall. The medial wall also has a steeper angle from the ground up to the coronary band. Once this is understood, it is very easy to spot this hoof conformation, which is prevalent among Standardbred racehorses. While it’s not always causing interference in each occurrence, it does need to be addressed just the same.
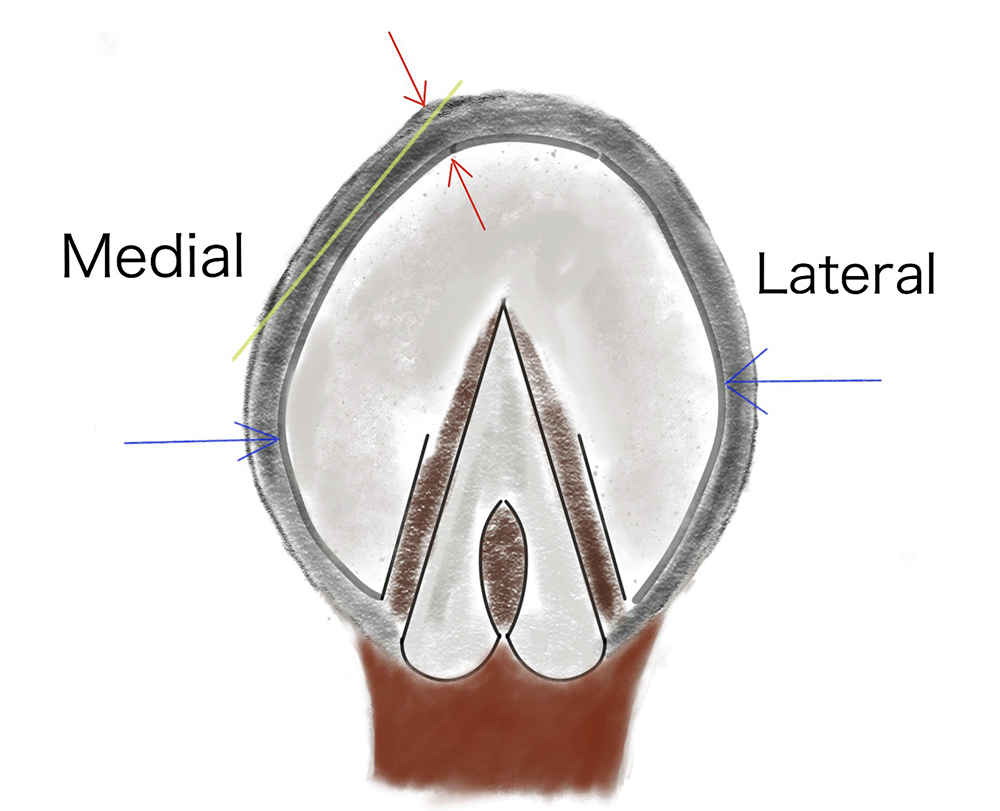
| Figure 2 |
Figure 2 is the bottom view of the same hoof type. Note that the medial branch of the hoof has a flatter curve on that side, indicated by the yellow line, and the quarter bend of that side of the hoof is deeper into the heel, indicated by the blue arrow. The last thing to point out is the bump in wall thickness, just on the medial side of the toe center, indicated by red arrows. Very often I see gouges in the dorsal side of this exact area that have been made by strikes from the shoe of the front hoof.
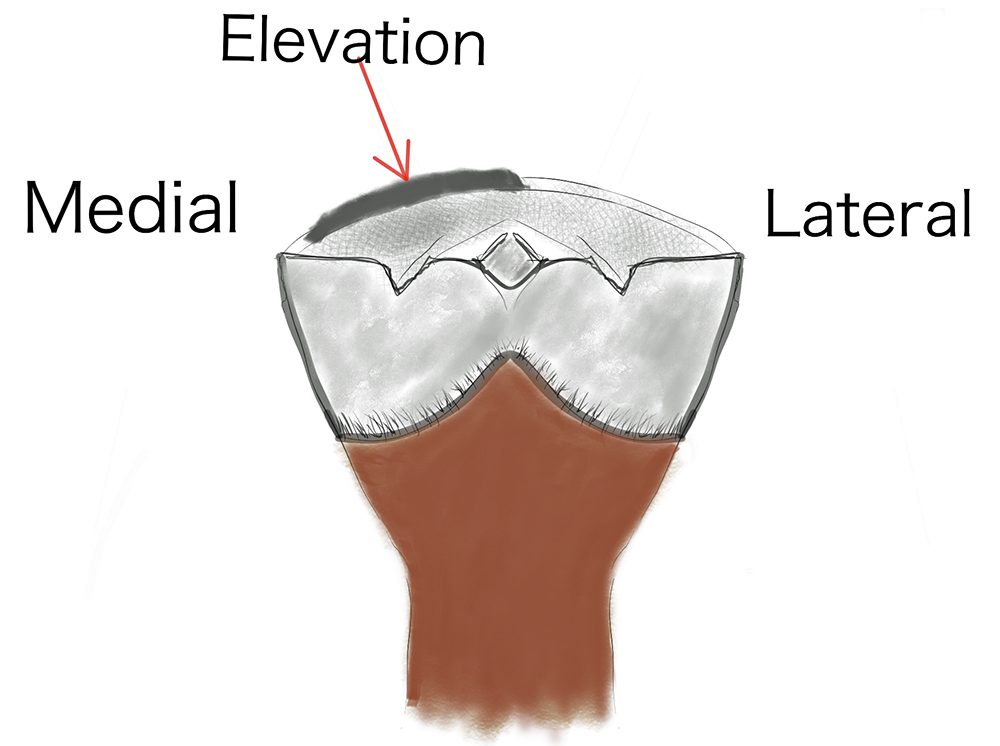
This hoof is often assessed for flatness and checked that it is level using the view illustrated in Figure 3. For this hoof type, we will see a hoof wall elevation in the darkened area. This will typically re-occur with every shoeing interval unless changes to the horse’s gait and/or soundness can be achieved. This hoof wall elevation should be addressed with every trim or a hoof can become very far from symmetrical.
When shoeing this hoof, the first thing I address is the thickness between those red arrows in Figure 2. If the additional distorted thickness is being stuck by the front shoe of the same side, then I see no reason to leave it there. I have often seen the gouges in the hoof wall be about as deep as the exaggerated thickness itself. This leaves me with respect for how slim the margins we work with sometimes really are. Simply matching the thickness from the rest of the hoof wall in the toe will often achieve great improvement.
| Figure 3 |
Next is to level (or attempt to level) the high spot illustrated in Figure 3. A level hoof plane at the distal border of these hooves is not always attainable but should be addressed to the best that hoof growth will allow. Remember that we can also use shoe thickness to compensate in this area by hammering or grinding away the shoe over that high area.
Last is to fit a shoe slightly full (wider than the hoof) in the area of the yellow line in Figure 2. Grind the proud edge of the shoe to meet the profile of hoof wall. I used an example last year in an article where we built the hoof wider in this area with acrylic before applying the shoe. It is sometimes found in these feet that the lateral heel has the same need for a full-fitting shoe as well.
I sometimes believe this “shape” or distortion is so common that it often gets overlooked or even considered normal. However If a distorted shape were normal, I would still fit into my old jeans and I’ve definitely turned a blind eye to that.


