
It’s sad when a tool wears out, or worse still, breaks. To lessen the pain of replacing a tool that costs between $100 and $200 here in England, I repurpose them by making a tool. It takes just 20 minutes to make a pair of hot-fitting tongs from an old set of clinchers, but they last a lifetime. I have made many for friends and they all love them.
Figure 1
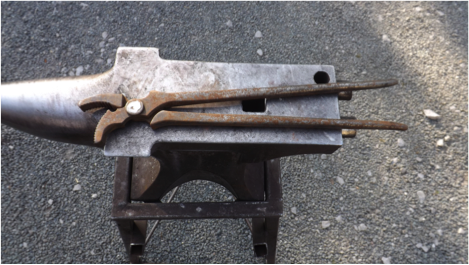 Figure 2
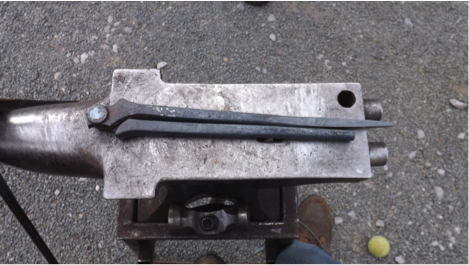 Figure 3
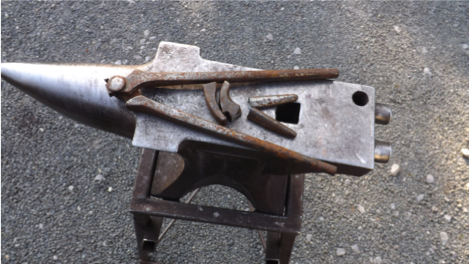 Figure 4
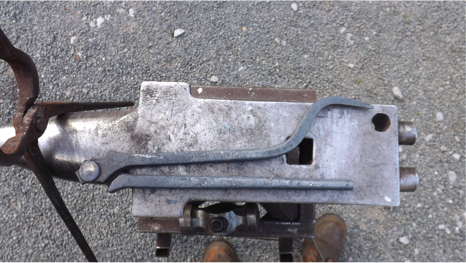 Figure 5
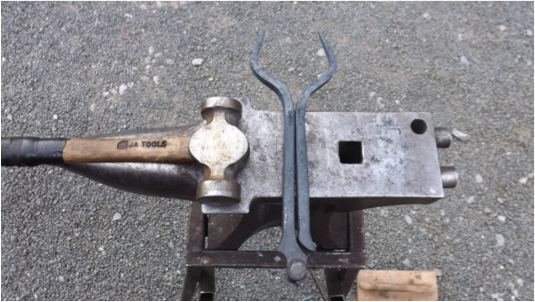 Figure 6
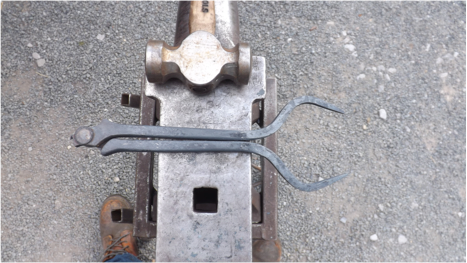 Figure 7
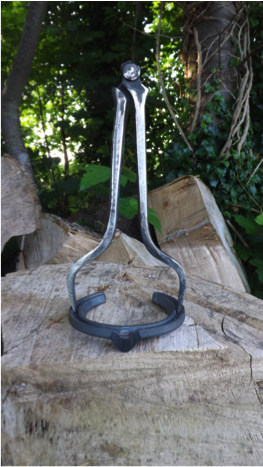
Figure 8
I’m using a pair of worn out clinchers (Figure 1), but any tool will do, as long as they are made from quality steel and feel nice in the hand.
Step 1: Trim off the jaws (Figure 2), but leave enough material to protect the rivet. This will allow for a gentle tap into the shoe.
Step 2: Using a 1-mm cutting disc, trim the handle length (Figure 3). The length is important, but not critical. If you trim the handles too short, it will be a stretch for the tongs to fit larger shoes. If they are too long, they topple over when resting on the floor. Experience, a good guess and flexibility while forging are the ways to achieving the best-finished product — like all farriery, really.
Step 3: After selecting a suitable pair of tongs to hold the old clinchers, place them in the forge, bringing them up to a yellow heat.
Step 4: To forge them, I open them up and work on one branch (Figure 4) at a time. Take care that you don’t burn the back of your hand with the branch that you aren’t working on. That will become clear when you try this.
Forge a square end similar to a pritchel on the end of both reins, taking care to keep the forging true at each state. If all of the corners are parallel at the end, they will work better.
Step 5: Forge a turn on the last 1/3 or 1/4 of the rein (Figure 5) to end up about 2 inches from the center when the tool is closed. This will make them good for a 4-inch shoe. Keep the last inch at the end straight to allow it to line up with the nail hole.
Step 6: The tricky bit now is to make the other side the same (Figure 6). Some find it easier to measure and mark it. Others, such as myself, try not to think about it and just bend it. Whatever works for you is the answer here.
Step 7: At this point, have a shoe ready to make the final adjustments (Figure 7) with the nail-hole size and the position of the reins to line up with your desired position in the shoe. Personally, I use the nail holes at the widest part of the shoe as they tend to be parallel with one another.
Step 8: I use a flapping disc on a 4-inch grinder to finish them off. It’s always nice to have a good-looking tool that’s also functional.
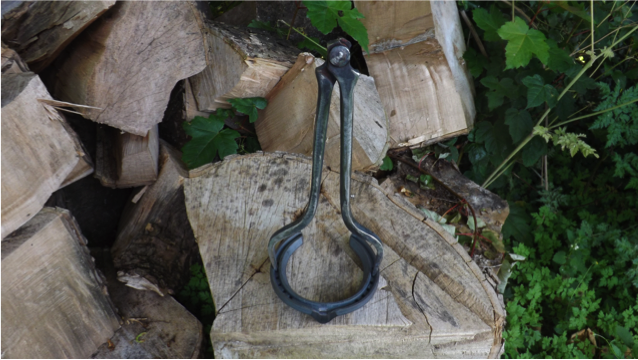
You will end up with a tool (Figure 8) that subtly improves your fitting — the even pressure is immediately apparent. Have a go. If nothing else, it’s very satisfying to make something useful.


Post a comment
Report Abusive Comment