Editor's note: Because American Farriers Journal readers asked for it, we are starting this series of articles that deals with the basics of the horseshoeing profession.
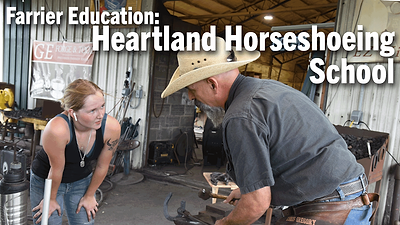
Written both for the newcomer to the shoeing field and the veteran farrier who wants a quick review of shoeing techniques, this series of articles is being written by Chris Gregory, an American Farrier’s Association Certified Journeyman Farrier, a member of the Worshipful Company of Farriers in Great Britain and the operator of the Heartland Horseshoeing School at Lamar, Mo.
When you first learn to forge, it seems like there’s always something looming in the distance that can only be achieved through great sacrifice, effort, determination and luck. For many, this is forge welding.
I can’t tell you how many people I know who have difficulty learning this process—myself included.
I first tried to learn forge welding by reading the directions on a can of Sure-Weld. That certainly doesn’t compare to having someone give you step-by-step advice and holding your hand the first few times you try.
This article makes the process a little easier by presenting a simple project. The horseshoe sandwich, or billet, used to be a very common project to teach young farrier students in the days when everyone used coal forges. But if you are patient, it can be done just as well in a gas fire.
This is the second project my horseshoeing school students are required to do. By doing this at an early stage of training, they don’t experience the notion that forge welding is supposed to be difficult. This is essential since making a billet is a confidence builder. By the time students are ready to build a bar shoe, there are rarely any problems with forge welding.
The Setup
Start with two worn steel shoes. Use at least a size 1 shoe with a good amount of steel left in it. If you use smaller size shoes, you may end up not having enough bar stock to complete the project.
Start by heating shoe A and bending it over on itself (figure 1). Bend the shoe toward the ground surface so you won’t have to weld the creases in the shoe. Only the back of the nail holes will show.
Take shoe B and straighten out one branch from the center of the toe back. You will end up with two pieces (figure 2). The non-straightened end of shoe B will fit in the middle of shoe A. Place them together and heat (figure 3).
Be careful and go slow as you remove the mass from the fire to flux with borax. The pieces will not be stuck together very well yet, so don’t make any quick movements. The reason we flux these pieces is because we are trying to create an oxygen barrier.
The oxygen reacts with the surface of the hot metal to create what we call slag or scale. This slag builds up between the two pieces you are trying to weld and creates debris that prevents the molecules from properly joining together.
Borax works well if you have a good eye for proper heat. Since borax burns off quickly, it does not work as well as most commercial fluxes which nullifies the effect of the flux. With commercial fluxes, you have a larger window of opportunity once the steel reaches the appropriate welding temperature. With borax, you have to be ready when the steel is ready.
One of the best ways to teach beginners to properly time their weld is to recommend they wait until it seems like the steel disappears in the fire. If your fire is hot enough, the steel will take on the color of the forge liner. Once this happens, the temperature of the steel is as hot as your forge can get it.
This rule applies to properly working propane forges. However, once your piece disappears in a coal fire, it is probably too late.
As soon as the proper temperature is achieved, take the pieces from the fire and hit them quickly with light hammer blows (figure 5). If you look at figure 5A, you will see most of the flux and slag will spray out from under your hammer and billet.
Think Safety
Be sure to wear safety glasses and be extremely aware of your surroundings. The eyes of kids and sitting adults are often at anvil height.
Don’t hit the material too hard with your hammer at this stage. If you hit the shoe too hard, the steel will draw faster than it can bond. You are also working at a very hot heat and hard hammer blows can do a lot more damage at these high temperatures. At the end of every heat, brush the work (figure 6) and apply more flux before putting the steel back into the fire.
If everything has gone correctly, the two pieces will be stuck together. They will be very easy to hold and manipulate when worked. Repeat the steps starting every heat with light hammer blows, which allows the pieces of steel to properly join together.
Once they are joined together during the first portion of the heat, you can hit it much harder to draw out the length and decrease the section. I find it useful to use the horn under the pieces to get more draw (figure 7). Continue to straighten and draw the welded portions of the work as you go.
Don’t be in a big hurry. Be sure the area you are working on is completely welded prior to moving to the next area (figure 8). If the piece cools at the same rate and there are no visible seams, you are probably forge welding correctly.
Flux only the area you can successfully work in each heat. This will be about 2-inches past the last area you welded (figure 9). Once you get close to the heels of shoe A (figure 10), flip the tail of shoe B back over on the welded portion of the billet. Start working back from this point as you did at the beginning (figure 11).
Weld and draw the piece until you reach the last heel portion of shoe B (figure 12). Hit the heel with the edge of your hammer to draw it as you weld it into the billet. If you hit it directly without drawing or scarfing, it will cut the billet and leave a cold shut when the piece is done.
You are now ready to finish drawing out the entire billet to the desired stock dimension (figure 13). The piece may be larger in the center and is often thin on the end. You may need to upset the ends of the billet to make a larger section (figure 14).
Quench the area of the steel stock that is the right dimension so you will only be upsetting the steel where it is needed. The last step before making the shoe is to cut the billet to the desired length. This can be done in any number of ways, but I prefer a hot cut (figure 15).
The finished shoe (figure 16) shows a blemish from one of the old nail holes.
You’re Now Ready For More Forging
Once your make a set of shoes with this technique, you will feel kinship and respect for the craftsman of yesteryear who used every scrap of iron over and over with this type of forging.
Good luck—and believe me, the ability to build a horseshoe sandwich will definitely improve your overall forging ability and shoeing work.


Post a comment
Report Abusive Comment