Bill Poor could have a pretty impressive trophy case.The farrier from Houston, Texas, has taken home his share of prize money, trophies, ribbons and belt buckles from various shoeing competitions. He’s been named to the American Farrier’s Team on more than one occasion, and this year is serving as team captain.
But as he forged a set of of handmade shoes for a dressage horse named Ollie on this March morning, he made it clear that he believes both he and his clients benefit from his competitive experience.
Learning By Doing
“I really believe it has made me a better shoer,” he says. “You don’t just learn how to build shoes, you learn what they’re used for. You learn what you have to do to make them fit a hoof the right way. I think because you go back and forth and study the hoof with the shoe you’re building in your hand, you learn more about how to make any shoe fit the hoof.”
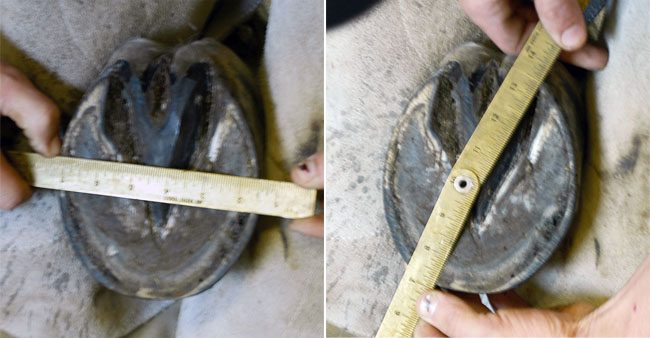
Poor starts the process by carefully trimming Ollie’s feet. He then takes out a tape measure. He notes that the feet measure 13 1/2 inches from heel to heel, but he says he’ll cut stock for a full 14 inches.
“I want the extra 1/2-inch of stock so I can bump it into the middle,” he says. “That will add more support and strengthen the shoe.”
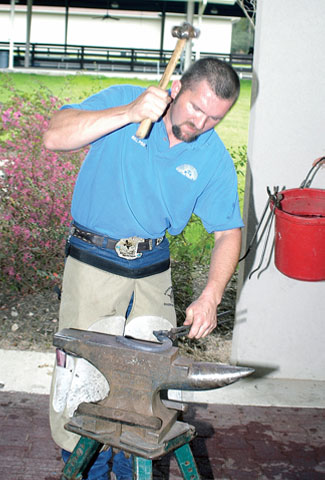
Poor goes to work quickly. His system is to have one shoe in the fire heating while he forges and shapes the other shoe. His hammer control is precise as he switches easily from powerful blows designed to move a lot of steel quickly to quick taps for fine-tuning bevels and angles.
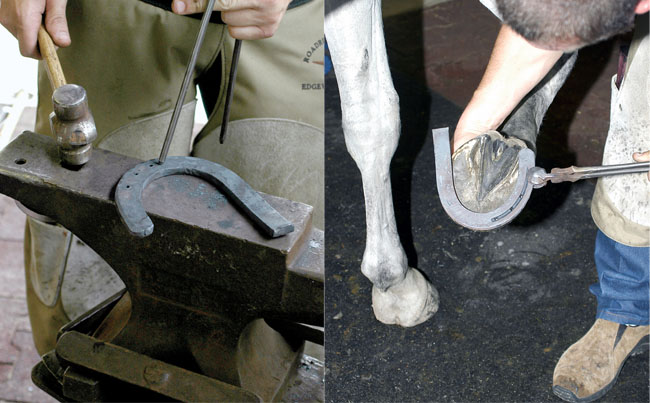
BENDING AND CHECKING. Poor forges the first branch of his shoe. He’s careful to check the arc against the hoof as he works, to be sure he’s getting the fit he wants.
Custom Made And Fitted
There’s very little wasted motion as he moves around the anvil, He also makes several trips back and forth to the horse, checking his forging against the shape of the hoof, making sure his toe bend is where he wants it and that his upsetting is bumping the added steel to the area of the shoe where he wants the support. Each check moves the process of bending and shaping the steel into custom-fitted horseshoes.
For example, Poor fullers and punches the nail holes for one branch of the shoe and checks its fit against the foot before he shapes and fullers the other branch.
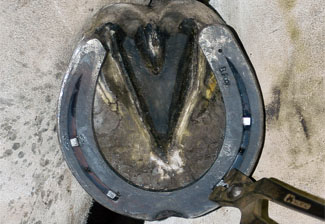
ROOM TO GRAB. When punching nail holes, Poor likes to place them a little ways up from the end of the crease. That way, the nail will be easier to get hold of with a creased nail puller when it’s time to remove the shoe.
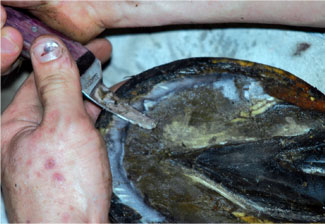
GOLDEN RULE. Poor says it’s vital to be sure to seat out the area just behind the hoof wall to prevent sole pressure. He calls it his “golden rule.”
Poor believes knowing how to build shoes helps him better modify keg shoes to fit and is an invaluable tool when a horse has special shoeing needs. It gives him the ability to build the perfect shoe for that horse, rather than having to adapt a keg shoe that may not be quite what’s called for.
Building a shoe also involves a lot more than showing off your forging skills, he says.
Little Things Count
“Depth-wise, for instance, you want the exit hole centered to get a warmblood nailed up properly, “ he says. “These are some of the things you have to think about as you’re building a shoe. There’s a lot more to doing it right than just having good forging skills.”
On the seventh heat, Poor draws his clips and takes the shoe to the horse. He checks his fit, then sets the shoe aside and uses his hoof knife to put a notch in the hoof wall for his clip. He takes the shoe back to the anvil to adjust the clip angle.
TOE CLIP AND NOTCH. Before he nails on his shoe, Poor uses his hoof knife to cut a notch for the toe clip to fit into. The finished shoeing job is at the right.
He then takes the shoe back to the horse and hot fits it. He examines the burn pattern on the foot surface of the shoe to make sure he has just the fit he wants. Once he’s satisfied, he takes the shoe back to his truck and uses a belt sander to safe the shoes.
He points out that he’s left enough sole to protect the foot, but before he nails the shoes on, he’ll take just a little sole from the area just below the rim of the hoof wall to ease any sole pressure.
“That’s the golden rule. Just before you nail, take off just that edge inside the hoof wall,” he says. “Otherwise, the first time the horse steps out on that concrete and the sole pressure hits, he’ll be lame just like that.”
As he begins to nail his shoes in place, he points out that he’s punched the heel nail hole a little further up from the end of the crease than some would.
“If you put the nail hole there, it will be a little easier to get hold of the nail with your creased nail puller when you want to remove the shoe for a reset,” he says.
When the shoes are nailed into place, the job is just about done.
“If you’ve learned your trade and done your forging right, you shouldn’t have to do anything more when you take the shoe to the foot than nail it on and clinch it,” says Poor. “You shouldn’t have to rasp it at all, except for the clinches.”
When the shoeing job has been finished, Poor points out some of the trademarks of his shoeing.
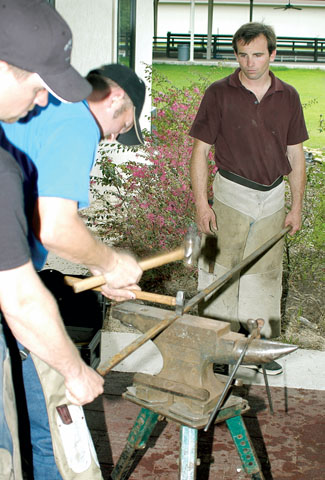
CUTTING TO LENGTH. Poor cuts the proper length of bar stock for the shoes.
COMPETITION BELIEVER. Bill Poor, captain of this year’s American Farrier’s Team, believes competing in forging competitions has helped make him a better farrier.
“You’ll see a lot of steel showing around the hoof wall in my shoes,” he says. “I fit them full for support, but am careful about beveling the shoes. I don’t have a problem with horses pulling shoes because they step on the edges. I’m also leaving some shoe outside the heels to make sure they’re supported.”
As Poor is finishing up, Ollie’s trainer walks by.
“I need magic shoes on this one,” she tells Poor as she stops and inspects the work.
Judging from the care Poor took in forging them, these should fit the bill.


Post a comment
Report Abusive Comment