LEARN MORE
To watch a video of Craig Trnka discussing and making this specimen sidebone shoe, visit
americanfarriers.com/0719
For the 2020 Summit Mail-In Forging Exercise, I’ve selected a sidebone shoe. In the years that I’ve made the shoes for this contest, I’ve had two goals. I want to test your forging ability, but I also want to choose one of the most practical shoes I nail on. This is a beneficial shoe for those older horses that need some help moving laterally without affecting the trim because you can put some of the trim in the shoe.
I will be on site to judge the shoes at the 2020 International Hoof-Care Summit. If you are there, stop by the World Championship Blacksmiths booth to talk about your shoe after it is judged. In addition to the practicality, I think you’ll find this shoe presents some unique challenges.
This is the sixth annual Summit Mail-In Forging Exercise. Thank you to VICTORY Racing Plate Co. for sponsoring this challenge again. You can watch a video of making this shoe at AmericanFarriers.com/summitshoe. You’ll improve your skills and earn a free T-shirt just for entering. You may win the buckle. But remember, it isn’t about winning — it is about the journey. Good luck!
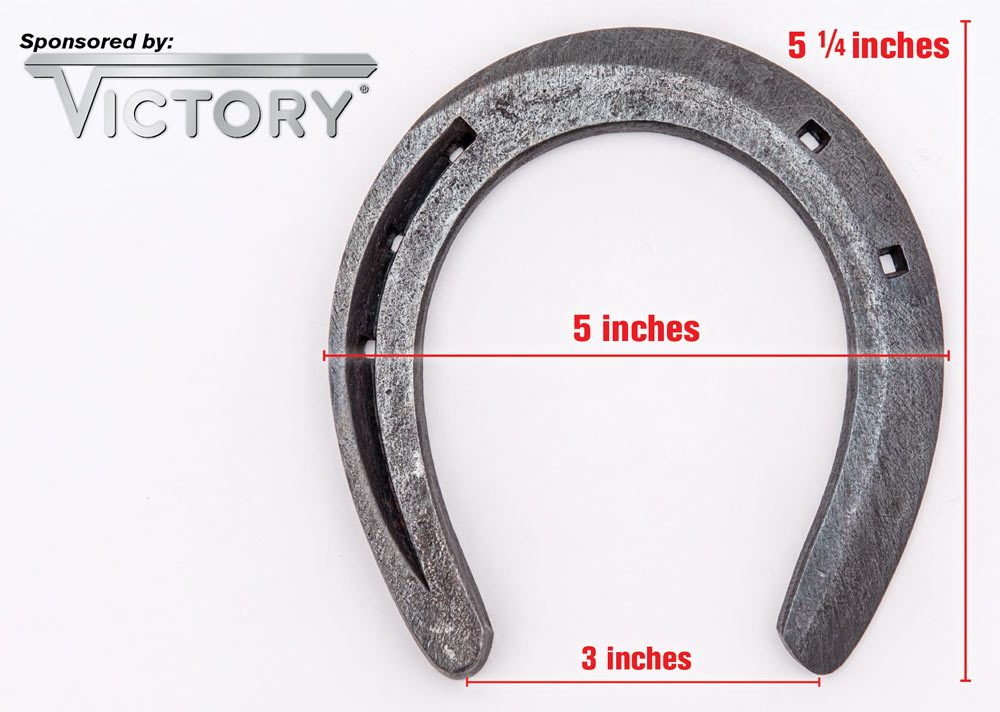
Sponsored by VICTORY, this forging exercise requires making this sidebone shoe. You have until Jan. 16, 2020, to mail your entry to the AFJ office. Read instructions on how to enter below.
Dimensions (measurements): 5 inches at the widest part of the shoe, 5 ¼ inches from the heels to toe, 3 inches to the from the tip of one heel to the other.
THE JUDGING CRITERIA
The steps for the sidebone shoe are guidelines to give you a starting point, but use your imagination to make it to the specs delivered. Matching these specs is most important. In terms of the judging, the other areas we’ll look at include:
- How is the nail fit? Are the nail holes center of stock (two on the lateral and three on the medial)?
- Is the shoe safed off to the medial toe and fullered on the medial?
- Flat is important, and flatness will factor into the judging, but I will first look at the previously mentioned measurements and features.
Step-By-Step
1.
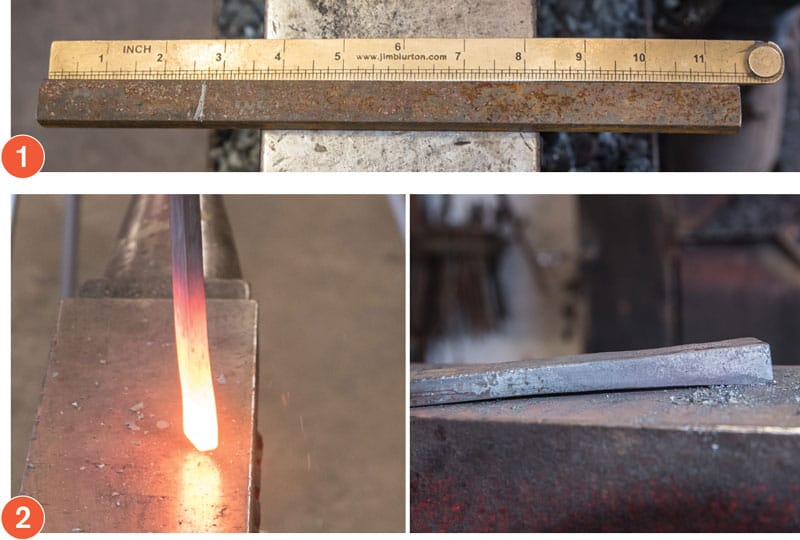
Start with 11 ½ inches of 3⁄8- by 3⁄4-inch stock.
2.
I will work with the medial heel first by doing a bit of a bump, I upset about 2 ¾ inches to 3 inches. I want to give a lift to the medial side. It is a spiral shoe, so I will add from one side by taking away from the other to get that wedge shape. Be mindful to avoid buckling. Bump it up enough to not get a trough in the stock — keep your surfaces flat. The biggest downfall that occurs here is when someone doesn’t bump up enough to have the material to make a wedge.
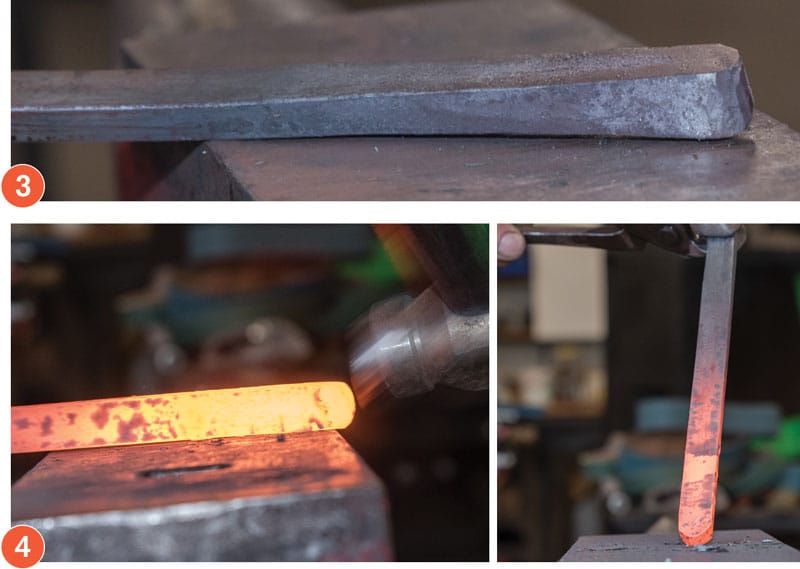
3.
Working on the medial heel, I flatten it up and revisit to blend those edges in.
4.
On the lateral heel, I work to make a circle. The safing will put the check in for me.
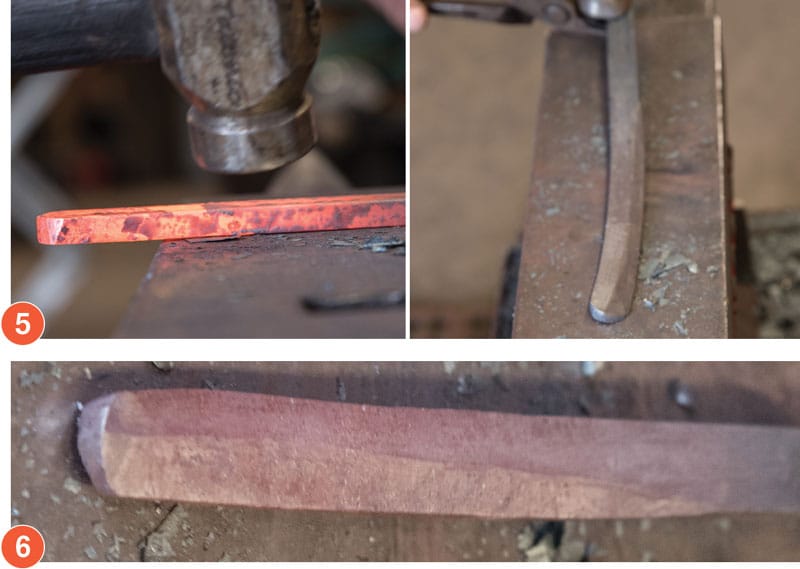
5.
Once I have my circle, I hold my tongs across the anvil and work on putting the outside safing on the lateral branch. Since I am only safing that edge, I only want to narrow my stock from the inside of the web so I don’t make it mushroom again.
6.
I have the line started, but it will take a couple of heats to get it fully put in there, so be patient. You want to do this in the straight because when you bend it and make that radius, everything will look nice and clean.

7.
As you work through this lateral branch, always revisit the heel to keep it in check. I continue to redo my “knife blading.” I’ll also work on narrowing it back up again, which will give some height too, which helps the cause in making the shoe. This is where I end up after this heat.
8.
On this heat, I’m focusing on making a solid, straight line, taking the time to narrow it back up when necessary.
9.
Again, I am careful to narrow it up by hitting the inside edge of the web so it doesn’t expand on the side I hit.
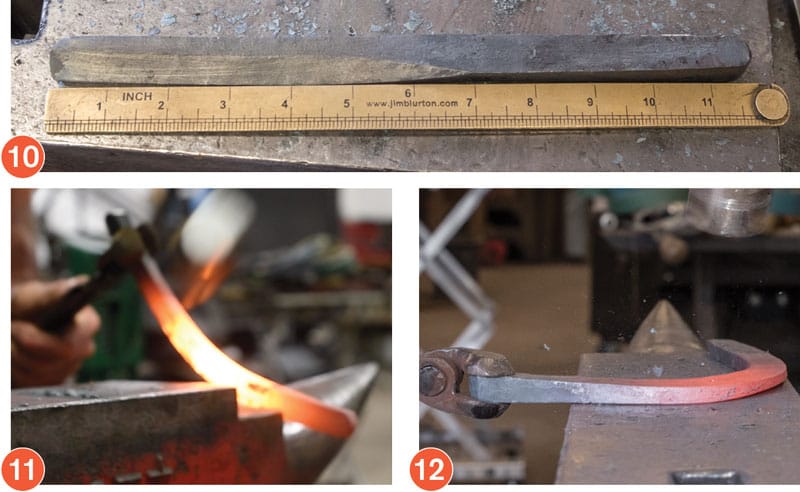
10.
I am at my original length after this heat.
11.
I want a nice even toe. I can make the lateral branch grow at any time, but I’ve already committed to the wedge on the medial side.
12.
I also concentrate on flattening the stock during this heat.
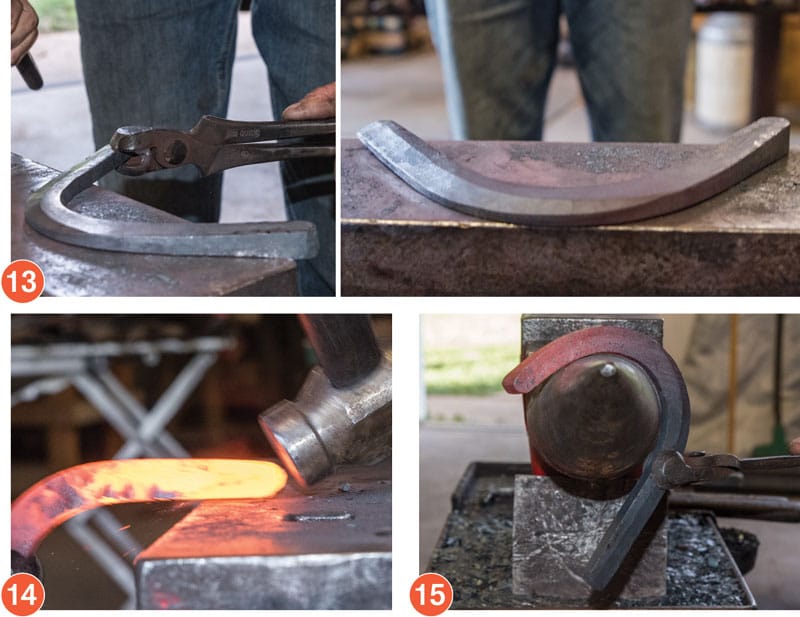
13.
I work on my line and tighten up the toe.
14.
I will first clean up the medial branch and heel.
15.
I then crack my medial branch.
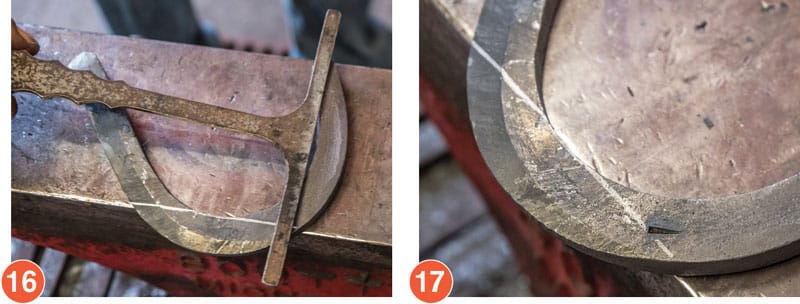
16.
I flatten the shoe a bit and then scribe across the toe to mark where the medial toe nail will be. This should make a box because the heel should end up underneath the medial toe nail.
17.
I mark where my fullering will be before taking the shoe back to the horn and sweetening up the medial branch.
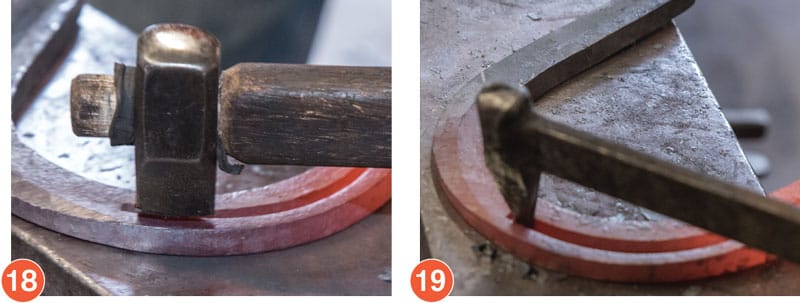
18.
On the next heat, I first flatten out the shoe and then run my fullering.
19.
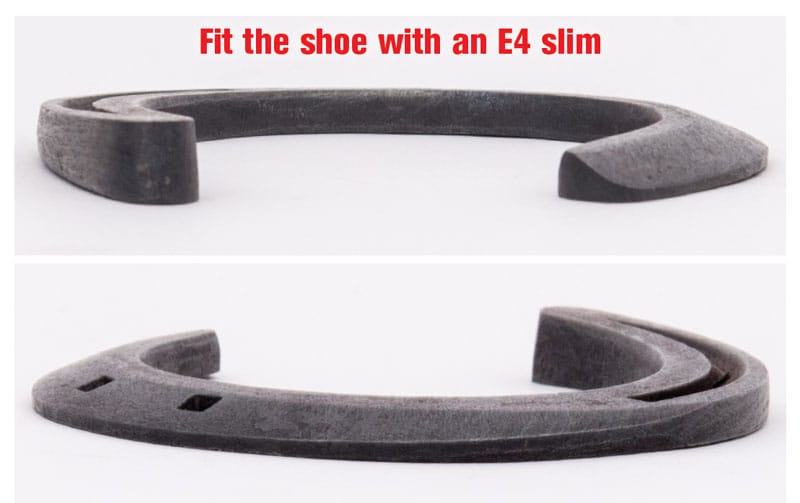
Next, I punch the medial nail holes for an E4 slim.
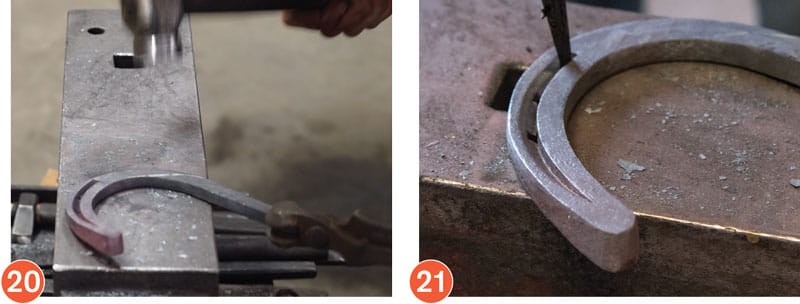
20.
One step not to ignore is marrying the fullering with the safing at the toe to keep it from pinching.
21.
I will tidy up and flatten the shoe before pritcheling the nail holes.
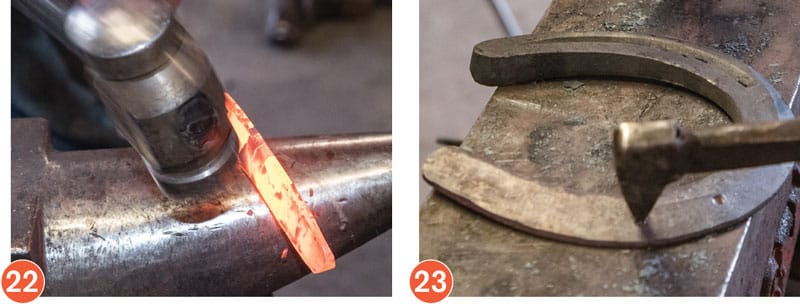
22.
Moving on to the lateral branch, I first revisit the heel before checking my safing. I hit where it comes off the horn and bring it around focusing on closing it up.
23.
I then place my two nails into the lateral branch.
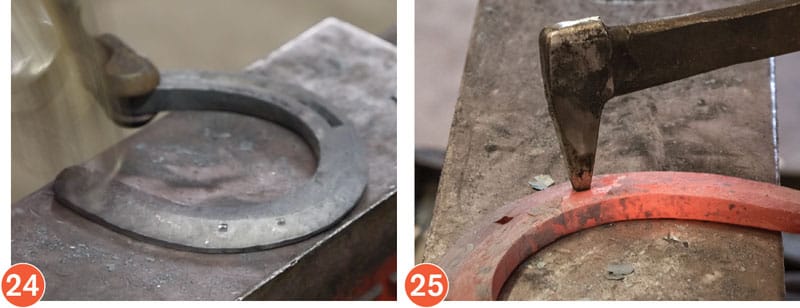
24.
With a good bend, I’ll come in and clean up my line more. I find this easier to do when the shoe is cooler because I can see the line better. If the shoe is hot and I misplace a blow, it can be more catastrophic.
25.
I finish punching my lateral nail holes. Always punch from both directions to make a square hole.
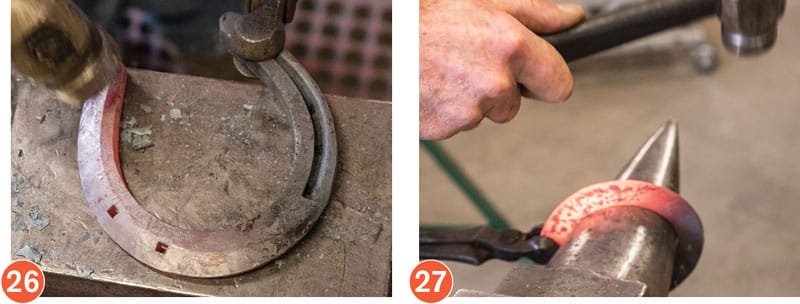
26.
I then focus on flattening the shoe and come around the lateral side to make that nice line, before I pritchel the nail holes.
27.
On the last heat, I focus on running my edges to bring my lines together and get a better arch. This then requires less rasping and much cleaner lines. I will also flatten the shoe and run my fuller one last time.
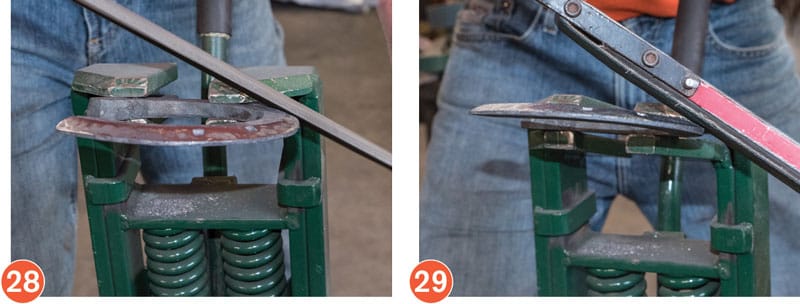
28.
I’m ready to rasp the shoe, cleaning up the inner and outer edges. This shoe doesn’t have to be hammer finished.
29.
I also like running a Sandbox finisher to help with the crisp lines. Don’t be afraid to go back and make some final touches on it.
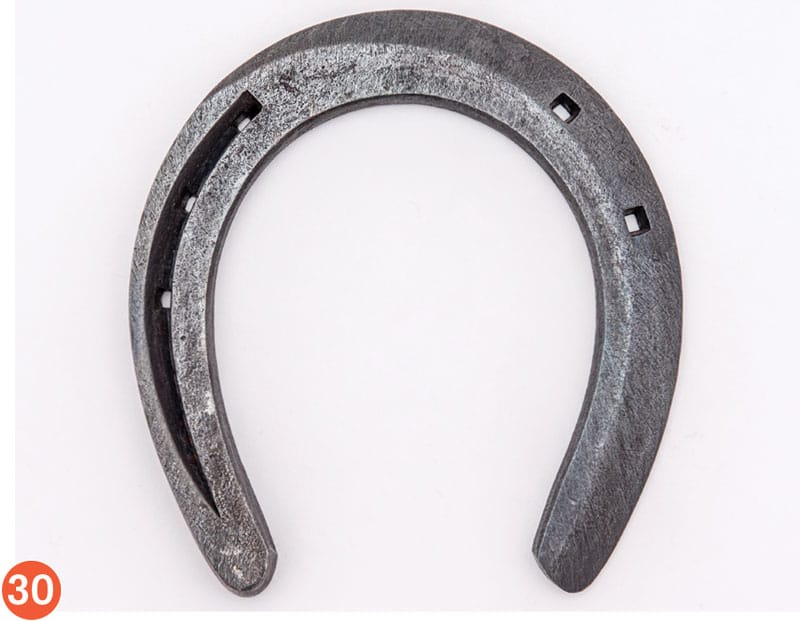
30.
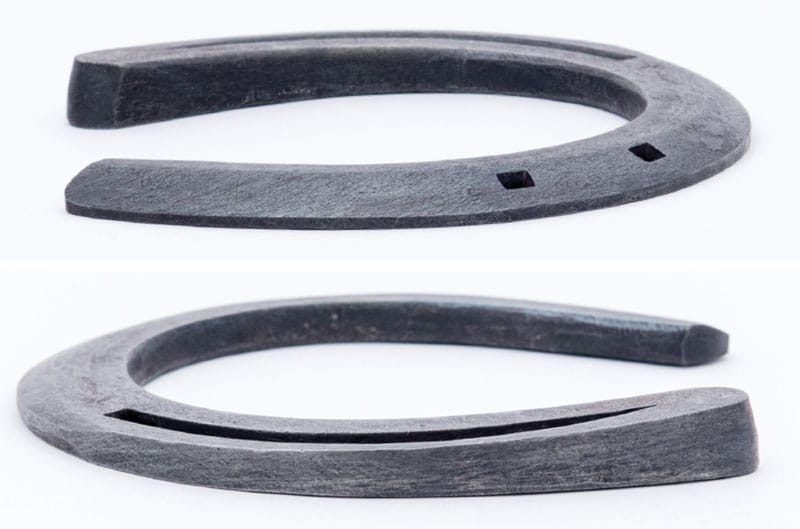
The finished shoe. The shoe measures 5 inches wide by 5 ¼ inches long and 3 inches between the heels. Again the nail hole size should fit an E4 slim nail.
How To Enter
Step 1: Make the shoe as described by Craig Trnka.
Step 2: Obtain and complete the entry form at AmericanFarriers.com/Summitshoe. If you are unable to download the form, contact American Farriers Journal at (262) 782-4480 to request a form to be sent in the mail.
Step 3: Send in the completed form and your shoe. If you won’t attend the IHCS, mail this entry form and your concave shoe to American Farriers Journal, Summit Mail-In Forging Exercise, 16655 W. Wisconsin Ave., Brookfield, WI 53045.
Your entry must be received in the mail by Jan. 16, 2020.
If you are entering from outside the U.S., DO NOT assign a value to your shoe on the customs declaration form.
If you are attending the IHCS, drop off your entry form and concave shoe in the Duke Energy Center near the IHCS registration area by 5 p.m., Jan. 21, 2020.
Step 4: Each contestant will receive a free commemorative T-shirt. The top finisher will earn a belt buckle and 2021 IHCS registration.
T-shirts will be mailed by March 1, 2020, and immediately given to those submitting a shoe at the Summit. All shoes not picked up at the IHCS will not be returned.


Post a comment
Report Abusive Comment